HUNYUAN | AllInOne ▪ Fast ▪ Basic & Advanced
Click "Show more" for Requirements and Details
The BASIC workflows are designed to be as simple as possible, keeping in mind your feedbacks (ty) about my previous workflows being too complex.
This workflows includes settings and values I use more often after daily use since day1,
and built around the Fast model, but feel free to switch to another model and raise steps accordingly. By default, the Fast Lora is also loaded but set to a negative value. This is because I find the Fast model to be a bit "overcooked," so I tend to dial back the "Fast factor" from itself.
If you’re curious to understand this reasoning in more depth, I recommend checking out this article that contain all tips and tricks: [link]

Advanced workflows includes a bit more compared to the basic one.
Beyond a certain threshold, it starts becoming less user-friendly. So, I thought that the bare essentials, which I consider the absolute minimum, will be found in the basic workflows. Anything additional start being included in the advanced workflows.
All the worflows avaible on this page are focused on prioritizing timing, achieving good results AS QUICK AS POSSIBLE, NO COMPROMISES.
If you are looking for ultra-high-quality videos and the best this model can deliver
then this are probably not the workflows for you, unless you want to tweak settings.
I settle for acceptable balance between quality and speed.
Long waiting times make it impossible to truly understand how this model behave and respond to every little settings changes , the loras you swap, sizes and so on.
You can't master the use of any AI models with eternal waiting times
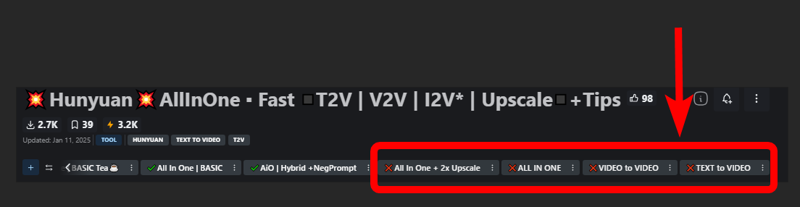
?"BASIC All In One" use native comfy nodes, it has 3 method to operate:
-
T2V
-
I2V (sort of, an image is multiplied *x frames and sent to latent, with a denoising level balanced to preserve the structure, composition, and colors of the original image. I find this approach highly useful as it saves both inference time and allows for better guidance toward the desired result). Obviously this comes at the expense of general motion, as lowering the denoise level too much causes the final result to become static and have minimal movement. The denoise threshold is up to you to decide based on your needs.
There are other methods to achieve a more accurate image-to-video process, but they are slow. I didn’t even included a negative prompt in the workflow because it doubles the waiting times.
-
V2V same concept as I2V above
?"BASIC All In One TEA ☕"
an improved version of the one above, with slightly different settings for even faster speed.
It's based on tea cache nodes, you need to install it to make it work
? "Advanced All In One TEA ☕"
an improved version of the BASIC All In One TEA ☕, with additional methods to upscale faster, plus a lightweight captioning system for I2V and V2V, that consume only additional 100mb vram.
Upscaling can be done in three ways:
-
Upscaling using the model. Best Quality. Slower (Refine is optional)
-
Upscale Classic + Refine. It uses a special video upscaling model that I selected from a crazy amount of multiple video upscaling models and tests, it is one of the fastest and allows for results with good contrast and well-defined lines. While it’s certainly not the optimal choice when used alone but when combined with the REFINE step, it produces well-defined videos. This option is a middle ground in terms of timing between the first and third method.
-
Latent upscale + Refine. This is my favorite. fastest. decent.
This method is nothing more than the same as the first, wich is basically V2V, but at slightly lower steps and denoise.
Three different methods, more choices based on preferences.
Requirements:
-ClipVitLargePatch14
download model.safetensors
rename it as clip-vit-large-patch14_OPENAI.safetensors"
paste it in \models\clip_vision\
paste it in \models\ESRGAN\
Update Changelogs:
|1.1|
Faster upscaling
Better settings
|1.2|
removed redundancies, better logic
some error fixed
added extra box for the ability to load a video and directly upscale it
|1.3|
-
New prompting system.
Now you can copy and paste any prompt you find online and this will automatically modify the words you don't like and/or add additional random words.
-
Fixed some latent auto switches bugs (this gave me serious headhaces)
-
Fixed seed issue, now locking seed will lock sampling
-
Some Ui cleaning
|1.4|
-
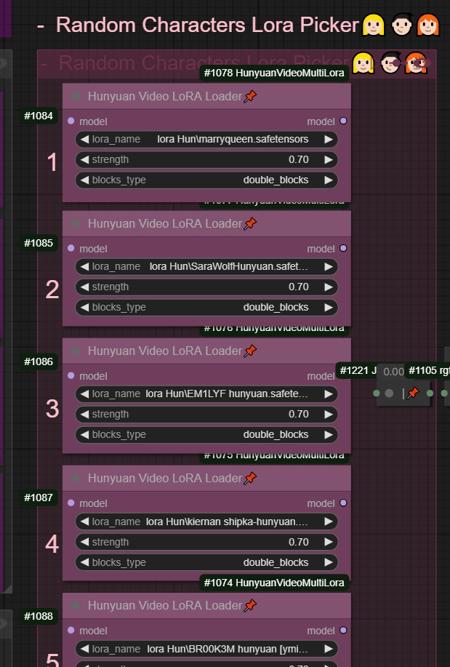
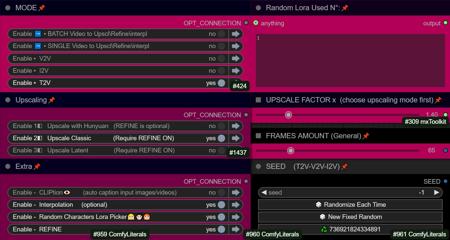
Random Character LoRA Picker, an extra lora group dedicated to characters.
Fill the pink group with 5 character LoRAs you like, and a random LoRA will be selected.
(You can toggle this option on/off if you don't want to fill everything.)
You can see which lora was used in the dedicated window that shows the corresponding number.
-
Batch Video Processing – Huge Time Saver!
You can now generate videos at the bare minimum quality and later queue them all for upscaling, refining, or interpolating in a single step.
Just point it to the folder where the videos are saved, and the process will be done automatically.
-
Added Seed Picker for Each Pass
You can now, for example, lock the seed during the initial generation, then randomize the seed for the upscale or refine passes.
-
More Room for Video Previews
No more overlapping nodes when generating tall videos (don't exagerate with ratio obviously)
-
Expanded Space for Sampler Previews
Enable preview methods in the manager to watch the generation progress in real time.
This allows you to interrupt the process if you don't like where it's going.
(I usually keep previews off, as enabling them takes slightly longer, but they can be helpful in some cases.)
-
Improved UI
Cleaned up some connections (noodles), removed redundancies, and enhanced overall efficiency.
All essential nodes are highlighted in blue and emphasized right below each corresponding video node, while everything else (backend) like switches, logic, mathematics, and things you shouldn't touch have been moved further down. You can now change settings or replace nodes with those you prefer way more easily.
-
Notifications
All nodes related to the browser notifications sent when each step is completed, which some people find annoying, have been moved to the very bottom and highlighted in gray. So, if they bother you, you can quickly find them, select them, and delete them
? "Hybrid + Negative Prompt" use TeaCache nodes for upscaling, and comfy native nodes for everything else, with the addition of negative prompt that can be enabled or disabled. I shared this one cause was requested, i don't use much negative prompt because it double the render times. Tea cache nodes are required.
Bonus TIPS:
Here an article with all tips and trick i'm writing as i test this model:
https://civitai.com/articles/9584
if you struggle to use my workflows for any reasons at least you can relate to the article above. You will get a lot of precious quality of life tips to build and improving your hunyuan experience.
All the workflows labeled with an ❌are OLD and highly experimental, those rely on kijai nodes that were released at very early stage of development.
If you want to explore those you need to fix them by yourself, wich should be pretty easy.
UPDATE 06/12/2024
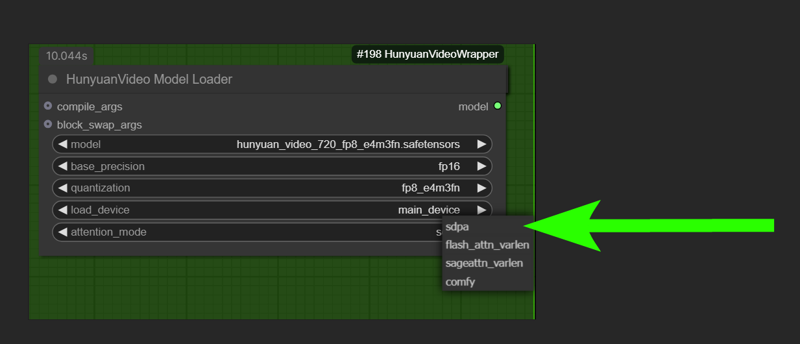
TRITON NO LONGER A REQUIREMENT.
⚠️change to SDPA or COMFY if you don't have TRITON installed
it will go a little slowed but works.
⚠️ if you get "int float" error or something try redownload the workflow, is a temporary bug of some nodes. I think i fixed. Let me know pls.
⚠️To run this model faster you may need to install torch on windows, wich is kinda pain in the ass. Fortunately purz wrote an installation guide for all of us: link.
Another usefull install guide: https://www.reddit.com/r/StableDiffusion/comments/1h7hunp/how_to_run_hunyuanvideo_on_a_single_24gb_vram_card/
⚠️ This model is completly uncensored, it knows human anatomy better than flux.
beware on prompting and be nice on posts and reviews ffs! previous post became pornhub instantly ..as expected ?
⚠️it can't do Will Smith. No spaghetti time ? Sorry about that
? INCREDIBLE MODEL JUST CAME OUT ? I'm speechless.
Kijai, our lord, has already made huge improvements to allow us to run this gold on consumer hardware with great speed. So, here we go:
With settings included in this workflow you can easily explore the latent space capabilities of this 13B beast and do all stress tests you want.
around 16gb vram on lowest settings but not really sure.
default settings of the workflow has very low steps, for the multi pass upscale thing.
if you are not going to use it and only doing one pass generation you should raise that steps slider to 12 or above
in this workflow you can load an image or a video.
-upload an image, it will be used to create auto prompt, and with a denoise lower than value 1 it will guide the video (not suggested, the video will be almost frozen the more you lower the denoise. just use it for autoprompt or for experiment. it can be usefull in some cases like steady shots)
-upload a video and do video to video. auto prompt will be created by analizing the first frame.
in both cases you can choose to disable auto prompt and make your prompt manually and/or leave denoise at value 1 and do TEXT to VIDEO without any input influence.
9 seconds generation time per video (*)
(*) rtx3090 - old workflows:
-
vid2vid mode
-
0.6 denoise
-
512x320 resolution
-
17 frames
-
12 steps
This setup is excellent for testing purposes.
Naturally, you can use whatever setting you prefer to achieve better quality.
Experiment with it and please share your feedbacks and findings!
if you want to see some real magic try this settings for txt2vid
720x480 - 25 steps - 17 frames
it takes 1:05 sec per clip on 3090 and results are .. unbelievable.
https://arxiv.org/pdf/2412.03603 Very Informative Reading
Have fun
描述:
训练词语:
名称: hunyuanAllinoneFastT2VV2VI2V_AIOAdvancedTea14.zip
大小 (KB): 35
类型: Archive
Pickle 扫描结果: Success
Pickle 扫描信息: No Pickle imports
病毒扫描结果: Success