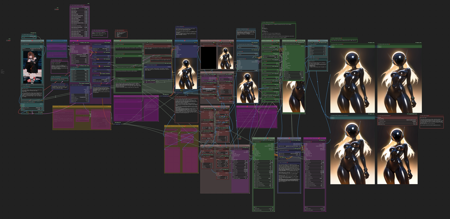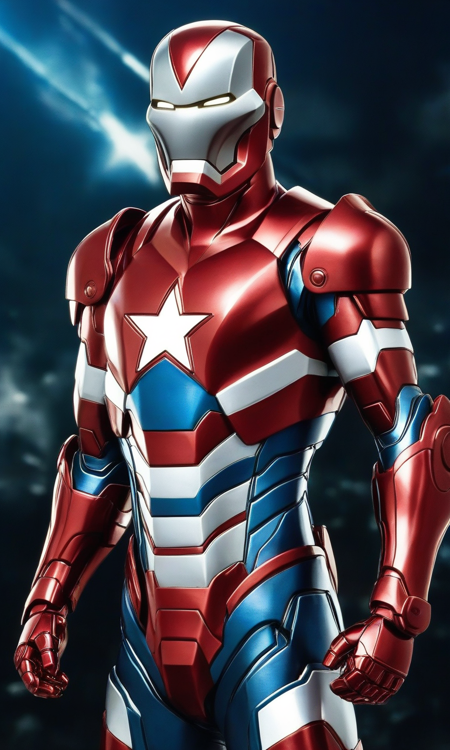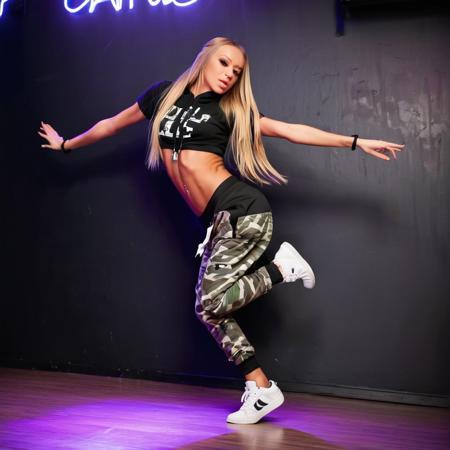
This workflow is intended to be freely used and I do not mind if you want to share/post it elsewhere.
If this is your first dive into comfyUI, it can look intimidating with all the nodes and noodles. This workflow is the result of my own growing pains with comfyUI and hopefully it helps save you some of the work/time in creating your own workflow.
Feel free to remove and add to the workflow to fit what you want. If my workflow helped you in any way, then great.
I recommend the "Actually Simple" version if you don't want to play with extra settings and want to "keep it simple". Sometimes simple is best.
I'm just someone who uses comfyUI and am not a developer. If you have technical questions, I probably can't help you. However, I will try to help you within the best of my abilities for any non-technical questions.
Side Note: to organize all the noodles open up your comfyui settings, find the "pysssss" section and click on it. Find LinkRenderMode, click on the dropdown menu and pick one of the other options. You can also just hide all the noodles by clicking on the "eye" icon in the lower right of your screen. (I think this is only on the "new" UI.
To install any missing custom nodes, it is recommended to use ComfyUI manager. Please be aware that ComfyUI manager does not always pick the right custom nodes, but most of the time it does. There is a list of links to the custom nodes below.
Disclaimer: If your comfyui, any related python dependencies, or custom nodes are not up-to-date, then this workflow or parts of it may not function.
If you disconnect any of the noodles or bypass something you should not have, then yeah something is gonna break and result in errors.
This workflow is provided as-is and should work for you as-is.
Workflow default settings will be set for non-cfg_pp samplers and have Dynamic Thresholding, Detail Daemon, and Watermark Removal disabled.
v4f changes:
Generation time from start to finish on a 3060 RTX:
-
Everything but wildcards enabled took 133 seconds.
-
Bypassing all the extras and doing 2x upscale in the 2nd KSampler took 73 seconds.
-
Testing used euler_ancestral_cfg_pp (sampler) + karras (scheduler) on lobotomizedMix_v10 (v-pred model).
Adjusted the prompting order. It seems to give better results. YMMV.
-
Thanks to @TsunSayu for the suggestion
Adjusted the layout (again).
Changed groups names to reflect what can and cannot be bypassed in the workflow.
-
You can see on the Fast Groups Bypasser Node that anything marked with DNB is what cannot be bypassed for the workflow to run from start to finish.
-
Some of the items not marked DNB are situationally able to be bypassed. Example: if you bypass the Detailer Loaders groups, then obviously the Detailers are not going to work and cause the workflow to stop before finishing.
-
Same with the Watermark stuff. If you bypass any part of it, you need to bypass all the Watermark Groups. The only exception is the Alternative Watermark Removal group since it’s not connected to anything.
-
The v-pred group should be bypassed if you are not using a v-pred model.
-
Technically, you can bypass/change whatever you want, but then it is on you to figure out why the workflow stopped working.
Detailers have been moved to after upscaling:
-
This has yielded better results for me. I do the face first and then the eyes.
Info regarding the Color Correction groups:
-
These cannot be bypassed.
-
You can either delete these from the workflow or change all the settings in the Color Correct nodes to 0 except for gamma.
Why do I use the Color Correction nodes?
-
Upscaling with KSampler/Ultimate SD Upscale strips/alters the color from the original image (in my experience).
-
Using these nodes helps bring the color closer to the original image colors.
Altering any of the settings in the Watermark portion of the workflow will probably break the watermark removal. All that should be changed there is:
-
Detection Threshold (higher = less detection, lower = more aggressive detection)
-
Watermark Detection Model (use whichever one you prefer)
-
Steps, scheduler, denoise on the Watermark Remover node can be adjusted.
-
Anything else, I do not recommend messing with in the watermark portion of the workflow. I didn’t come up with it and cannot advise you on what all the buttons, numbers, and settings will do.
Custom Nodes used in this workflow as of v4e:
ComfyUI-Impact-Subpack (the Ultralytics Provider node was moved to here)
ComfyUI-ImageMetadataExtension
If I missed anything or listed something not on the workflow any longer, then my bad. You should get a warning of what is missing when you load up the workflow. Impact-Pack seems to have to be manually git pull-ed for updates. (At least for me).
This has been tested on the models mentioned in my "Suggested Resources" below. YMMV. Try playing with the settings/prompts to find your happy place. Current settings are to my tastes and may be aggressive for some, leading to cooking the image or resulting in ghosting/artifacts. Adjust to your tastes accordingly!
Upscale Model:
You should be able to use whatever upscale model you like best. I primarily use 4x-PBRify_RPLKSRd_V3. (Note: this specific Upscale Model can throw some errors if your "spandrel" python package is not updated.)
Thanks to @Catastrophy for pointing this out!
FaceDetailer Models:
If I recall, Impact Pack includes the needed models to get you started, but if you want something else, you can find more by using ComfyUI Manager's "Model Manager" option. The two types of models needed will be "Ultralytics" and "sam".
I use this for the ultralytics face detection model. Look around on civitai for other adetailer models.
VAE Model:
I just use the normal SDXL VAE or whatever is baked into the checkpoint models.
Other Info:
Thanks to @killedmyself for introducing me to the Color Correct node from comfyui-art-venture. This has really been useful in countering the color fade from Ultimate SD Upscale.
I only use the Brightness, Contrast, and Saturation options for that node, but feel free to adjust to your liking.
Disclaimer: Please be aware that sometimes things break when updates are made by comfy or by the custom node creators.
For v3 and earlier:
"Load Lora" node is not needed. To use a lora, please use the "Select to add Lora" option on the "Positive Prompt" node. You can specify the weights just like in A1111 or similar interfaces.
Note: The fix for the apply_gaussian_blur error (courtesy of @Catastrophy ): "The problem lies currently within the github project "TTPlanetPig /Comfyui_TTP_Toolset". In one commit the function called "apply_gaussian_blur" was removed, although is is still used in the project. the workaround is described in Issue#15. It mentions to restore a function. To do this you have to manually edit one file in the comfyuifolder, save it and restart comfyui."
Note: if your prompts seem like they being completely ignored, please make sure to check if the "Mode" on the prompt nodes are set to Populate and not Fixed.
v4e changes:
Removed the 1st USDU node and replaced it with a KSampler (Sampler Custom)
-
This node upscales via the same upscaler model as USDU
-
Added a node to pick the upscale factor without you having to do the math. (Example: if your initial image is 1024x1024 and you set the Scale Factor to "2" this KSampler will upscale it to 2048x2048).
-
Node for selecting denoise for this node has been added as well to keep it separate from the USDU settings for denoise.
Watermark Removal
-
Split up the nodes to be just like how they are grouped in the workflow it originally came from.
-
Added the alternative version back in for those who want to use it. (Personally, I will stick to what I know works.)
Added Fast Groups Bypasser from rgthree
-
This allows you to toggle groups on/off in one place and also provides a way to go to any group by clicking on the arrow button.
Added a Detailer Group after the 1st Upscale.
-
This can be bypassed if you don't want to use it.
Dynamic Thresholding and Detail Daemon are set to bypass by default.
-
If you like using these (I do), then just re-enable them and adjust your parameters accordingly.
v4d changes:
Return of the old watermark flow.
-
was-node-suite-comfyui is required.
-
I use this watermark detector model, which can be found here.
-
Another detection model that is more aggressive can be found here.
Added a Seed Generator node to use the same seed across the workflow.
-
The only exception is the wildcard node. If you want to fix the seed on that node, you will have to do it manually. Having it connected to the seed generator node caused the same image to be recreated even when not set to "fixed". YMMV, but that was my experience with it.
The ModelSamplingDiscrete node has been added back in for folks using v-pred models.
-
You may or may not need it. It will be set to bypass by default.
Bookmarks have been reduced to 6.
-
They are set in a way that fits a 2560x1440 monitor, so if this does not work for you, you can delete them or ignore them.
v4c changes:
Added notes to pretty much everything on the workflow.
Trimmed down the Watermark Removal portion of the workflow thanks to a random person on the civitai discord providing a better one. No need for a detection model anymore. Yay!
-
This didn't work out. It would work sometimes, but other times it would destroy the picture. Re-added the old watermark removal in v4d.
Changed upscaling to use two USDU nodes. First to 1.5x, the second to roughly 2x.
-
Allegedly, this results in more detail (and I love details).
-
You can use a 2nd KSampler instead of the first USDU node, but that's up to you.
-
More re-arranging.
-
If you don't like spaghetti, install ComfyUI-Custom-Scripts. Go into your comfy settings, find "pysssss" on the menu. Click it. Find LinkRenderMode. Click on the dropdown menu in that section and pick "Straight" OR you can find a solution to hide them. I know that setting exists somewhere.
-
Added more bookmarks: up to 7 now.
The default settings in v4c upscaling is set to 1.5 and 2x (of the original image) in USDU. This has given me better results as far as quality goes, but can easily be toggled off if it's not for you.
v4b changes:
Added some QoL nodes.
Bookmarks added numbered 1 through 4 in places I thought were useful.
-
Just press 1, 2, 3, or 4 while not in a place where you input text/numbers to try them out.
Added a new (to me) Save Image node that does show the models/loras used when uploading to civitai.
v4a changes:
Added option to use Wildcards.
If you don't want to use wildcards, just click on the ImpactWildcardProcessor node and click CTRL+B to bypass OR make sure the upper text box of the node is empty. The better option is to use CTRL+B (or delete the node).
Other than that, some QoL changes and rearranging of the nodes.
v4 changes:
I am no longer using the Image Saver nodes as of v4. I tried to streamline the workflow and keep the features that I found the most useful. This workflow took inspiration from v3 and from the workflow that the author of NTR Mix had on some of their example images.
The current settings are to my preferences. You will need to adjust if you plan on using different samplers, etc.
The upscaling is set to 2x with half tile enabled in USDU. This has given me better results as far as quality goes, but can easily be toggled off if it's not for you.
Dropped ControlNet completely, it's not for me. (v3 and earlier has it)
With the current settings, I generate an image from start to finish in about 90 seconds on a 3060 RTX.
v4 uses Efficient Loader for the checkpoint/model and VAE. For loras it uses Lora Stacker. Both of those come from efficiency-nodes-comfyui.
Actually Simple:
Added a no-frills workflow for those who really just want to keep it simple, but want a little (very little) more than the default workflow. Check the "about" section off to the right for link to the two custom node packages required.
v3.0 changes:
Brought sd-dynamic-thresholding back. This will require the use of a secondary CFG node again. The CFG node in the "Extras" part of the workflow should be the "normal" CFG number you would use, while the CFG node in the section above it will be where you put the higher CFG number in. I usually go double (or more) there.
Added another Detailer node after Ultimate SD Upscale.
Removed Model Sampling Discrete node from workflow.
Current settings are using the built-in CFG++ samplers. If you are going to use different samplers/schedulers, please make sure to tweak the CFG and any other related settings accordingly.
v2.0e changes:
Dropped the ppm related nodes and the dynamic thresholding nodes. After testing this iteration of the workflow without them, time from start to finish is just as good with a larger upscale (now 3x) and quality seems just as good. I also removed the some of the custom ControlNet nodes, since the same result could be achieved with the built-in ones.
v2.0d (reupload) changes:
Added the ModelSamplingDiscrete node.
I found this node while checking out the sample workflow for the recent NoobAI release.
From my understanding (I could be wrong) of how to use this node, you toggle it to eps if you are using an EPS model. If you are using a v-pred model, then you would toggle it to v-prediction and enable zsnr by toggling it to true.
The official info on this node can be found here.
I tested this node out and I was pretty happy with the results.
I also expanded all of the nodes that are not in the watermark removal workflow. This should make it easier for people to reconnect nodes that have been disconnected. The downside is that it does clutter up the workflow more.
If you manage to disconnect something in the watermark workflow, just load your last image up in comfy from before it happened or reload the workflow.
Split up the USDU Step Denoise node. It is now two separate nodes that originate from the Image Saver custom nodes.
Also added some CN nodes for USDU from here, in case your ComfyUI Manager can't figure out where they are from.
v2.0c changes:
Re-added CFG++SamplerSelect node on the left side of the workflow. There will be a boolean toggle to switch between this node and the normal Sampler Selector node.
Setting the toggle to "false" enables this node (by default).
Also, added a text input node on the left side of the workflow connected to the "sampler_name" input on the Image Saver node.
Reminder: set the "Mimic CFG" node setting to 2.0 (at the highest) if you decide to use the CFG++Sampler Select node samplers. This is the recommendation from the node author.
v2.0b changes:
Added IMG2IMG to the beginning of the workflow. As an option: you can take existing images and run them through this workflow.
There will be a boolean switch above the Load Image node. Toggling this to true will run the workflow like normal. Setting it to false will run the workflow as image to image.
Make sure to adjust the denoise and aspect ratio as required. It would probably be beneficial to prompt as well, but feel free to experiment.
v2.0 changes:
Dropped the CFG++ node(s). If you liked those samplers, please continue to use the previous versions.
Scheduler name no longer has to be manually entered in the Image Saver node.
This should still work with and SDXL based checkpoints/models, but I have stopped using anything outside of Illustrious.
v1.9 changes:
Added TTPLanet_SDXL_Controlnet_Tile_Realistic and their custom pre-processor node to the workflow to work with Ultimate SD Upscale to try and squeeze out a little more detail. Settings are based on what works best for me, you may need to adjust to your own liking.
v1.8 changes:
An update was released for CFG++SamplerSelect that changed how it worked. (Which resulted in badly smeared images for me before this update).
The settings that worked best for me with this node are as follows:
-
sampler_name: <your choice>
-
eta: 1.00
-
s_gamma_start: 0.00
-
s_gamma_end: 1.00
-
s_extra_steps: false
Some more rearranging and consolidating all the "behind the scenes" nodes into one place.
I re-ran a previously generated image from before the node was updated with this version of the node and there were some differences in the result. Just FYI.
v1.7 changes:
-
Changed the Detailer node to the Impact Pack version. Seems like some were having difficulties getting the (AV) version.
-
Rearranged the layout a little and added an input node to feed into both the Steps/Denoise inputs for USDU. Now you only have to enter the numbers in one place instead of in both the Basic Scheduler and USDU nodes for that portion of the workflow.
v1.6 changes:
Faster workflow. Takes roughly 3.5 minutes on a 3060.
-
Removed Lying Sigma Sampler node for the more advanced Detail Daemon Sampler node.
-
Also removed the second KSampler. So now it's just the one Ultimate SD Upscale node for the upscale portion of the workflow.
Added the option to use FaceDetailer (AV).
-
I didn't notice a difference between this one and the one from the Impact Pack. If you prefer the Impact Pact one, you can just sub it in.
-
To use FaceDetailer, you will need some sort of face detection model. I use this one.
rgthree-comfy has a nice feature that can set a group to be bypassed in a workflow.
I have the FaceDetailer in its own group.
If you feel like you don't need to use it all the time, you can just toggle the icon that looks like a connector and it will bypass the FaceDetailer. This cuts off around 30 to 40 seconds from the workflow for me.
v1.5 changes:
Took what I liked about v1.4 and v1.3.
-
Dropped ApplyRAUnet and PerturbedAttentionGuidance from the workflow.
-
Added Dynamic Thresholding
-
Layout is similar to v1.3 again.
Settings are based on my tastes, please adjust to your liking!
Full workflow from start to finish averages about 4 to 5 minutes on my 3060.
v1.4 changes:
This version is specifically for use with the CFG++SamplerSelect node. If you do not plan on using the CFG++SamplerSelect node, then v1.3 should still be good to use!
I also added the ApplyRAUnet and PerturbedAttentionGuidance nodes.
Nothing too fancy but has been working great for me. For more info on the new additions (and an old one) please go to:
CFG++SamplerSelect: https://github.com/pamparamm/ComfyUI-ppm
Lying Sigma Sampler: https://github.com/Jonseed/ComfyUI-Detail-Daemon
PerturbedAttentionGuidance: https://github.com/pamparamm/sd-perturbed-attention
ApplyRAUNet: https://github.com/blepping/comfyui_jankhidiffusion
Note: Depending on the checkpoint/model you are using, you may have to make adjustments to the settings (as expected). Some models handle higher numbers in "Lying Sigma Sampler - dishonesty_factor." The author of the node recommends 0.1 for SDXL based models. You can play with higher numbers and see how it turns out for you.
The plus side:
-
More CFG++ samplers.
-
More stable end results (at least in my testing).
The downside:
-
Image Saver does not see the samplers from CFG++SamplerSelect by default. So the field for "sampler_name" will have to be manually entered on the Image Saver node.
-
Full workflow takes longer from start to finish. Roughly 6 minutes on my 3060 RTX.
v1.3 changes:
-
Added Detail-Daemon nodes
-
Added Image Comparer nodes from rgthree's ComfyUI Nodes.
As of 1.3 the workflow works as follows:
-
Initial Image Generation
-
Watermark detection/removal
-
Upscale x1.5
-
Upscale x2.5
-
Color Correction
-
Save Image
Please feel free to adjust the settings to your preferences. At these settings, I typically generate an image from start to finish in about 4.5 minutes on my 3060 RTX.
v1.2 and earlier:
This workflow works as follows:
-
Initial Image Generation
-
Watermark Removal (this requires a watermark detection model that will need to be placed in your ComfyUI/models/ultralytics/bbox folder) - I use this one: https://civitai.com/models/311869/nsfw-watermark-detection-adetailer-nsfwwatermarkssyolov8
-
Upscale 1st pass (current settings are set to 1.5x of the original image)
-
Upscale 2nd pass (current settings are set to roughly 2.5x of the original image)
-
Color Correction
-
Save Image (You will need to specify your output path on the Image Saver node in the "path" field).
描述:
v4e changes:
Removed the 1st USDU node and replaced it with a KSampler (Sampler Custom)
-
This node upscales via the same upscaler model as USDU
-
Added a node to pick the upscale factor without you having to do the math. (Example: if your initial image is 1024x1024 and you set the Scale Factor to "2" this KSampler will upscale it to 2048x2048).
-
Node for selecting denoise for this node has been added as well to keep it separate from the USDU settings for denoise.
Watermark Removal
-
Split up the nodes to be just like how they are grouped in the workflow it originally came from.
-
Added the alternative version back in for those who want to use it. (Personally, I will stick to what I know works.)
Added Fast Groups Bypasser from rgthree
-
This allows you to toggle groups on/off in one place and also provides a way to go to any group by clicking on the arrow button.
Added a Detailer Group after the 1st Upscale.
-
This can be bypassed if you don't want to use it.
Dynamic Thresholding and Detail Daemon are set to bypass by default.
-
If you like using these (I do), then just re-enable them and adjust your parameters accordingly.
Workflow using default settings from start to finish took 130 seconds on my 3060. YMMV.
训练词语:
名称: NotSoSimpleIsh_v4e.zip
大小 (KB): 18
类型: Archive
Pickle 扫描结果: Success
Pickle 扫描信息: No Pickle imports
病毒扫描结果: Success
名称: NotSoSimpleIsh_vv4e.zip
大小 (KB): 18
类型: Archive
Pickle 扫描结果: Success
Pickle 扫描信息: No Pickle imports
病毒扫描结果: Success


