 Download:
## WORKFLOW GUIDE: DESCRIPTION
----------------------------
This production process called "EML_LTX_TTV/ITV" has advanced techniques to achieve quality video based on LTX-Video by Lightricks.
✅Works on 8GB VRAM graphics cards
✅Two modes of operation: Text To Video and Image To Video with one switch.
✅Support for generated images: users often face the problem of "frozen video", which is the problem of lack of noise in the image. This production process automatically adds noise via crf, which gives the neural network an understanding of the "Big Picture".
✅Image recognition by Florence2 model
✅Generation of complex promts with one sentence based on
✅Saving to WebP and MP4
✅Convenient list of aspect ratios. Added 16:9 hint
By default the model has a resolution of 768x512, aspect ratio - 3:2, use custom resolutions at your own risk, better choose from the official list in the node-helper "LTXV Model Configurator"
It's based on Workflow XODA-LTXV https://civitai.com/models/974859
❤❤❤THANK YOU FOR PROVIDING THE WORKFLOWS❤❤❤
## WORKFLOW GUIDE: PREPARATION
----------------------------
0. After starting the workspace, you will most likely be missing the nodes you need. Go to Manager -> Install Missing Custom Nodes -> Select all (next to ID) -> Install
After installation, Comfy UI will ask to reboot, click and proceed to the next steps.
0.1 Model selection.
I prefer the ltx-2b-v0.9-bf16.safetensors model coupled with t5xxl_fp16.safetensors from Mochi
https://huggingface.co/MayensGuds/ltx-video-quants
If you have a 6GB VRAM card and below try the ltx-video-2b-v0.9-fp8_e4m3fn.safetensors model coupled with the clip loader t5xxl_fp8_e4m3fn.safetensors
Make sure that the "ltxv" mode is activated
?Tip: use Flux1 to generate images as they use similar text conversion algorithms.
0.2 Optimization Tips.
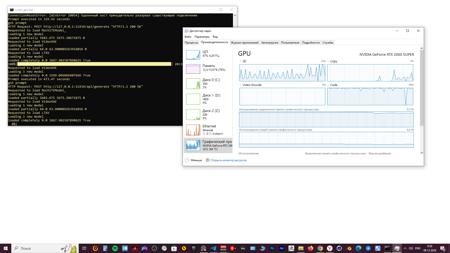
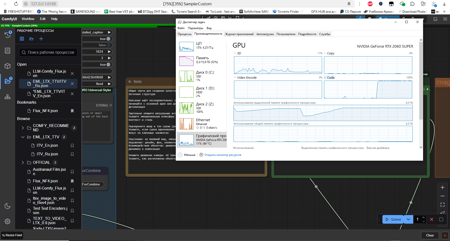
On my NVIDIA RTX 2060s 8GB VRAM graphics card, defaults of 768x512, 25 fps, 97 frames and 30 steps, yield ~10s/it, which equates to ~5 minutes per video. The "??? LTXV Model Configurator" on the left can be used to come up with recommended values. The module, like all its clones in space is not connected to anything, used as a reference.
To speed up it is better to reduce the number of frames than to change the resolution, but then the duration of the picture will be shorter. As a rule, I have enough ~50 frames, which at 25fps = 2 seconds of video. It is also worth setting 20 steps, because imho there is no difference in quality. As a result we have a good balance of speed/quality, which with optimization is ~5s/it, which is 2 times faster and the total time is ~1:30 on the video. For further processing like slowdown, two seconds of video should be enough to make a good shot. Llama takes up an impressive amount of VRAM, and more efficient consumption is being developed.
0.3. Installing Llama.
0.3.1. Download Llama from https://ollama.com/download and install.
0.3.2. Go to CMD or Powershell and paste this command: ollama run llama3.2
p.s. to copy Ctrl + C, and paste into CMD - right mouse button. After that Llama will automatically install on your computer and start running in the tray. In the next version this method will be replaced by gguf models.
## WORKFLOW GUIDE: VIDEO GENERATION
----------------------------
1. Upload image (load image>choose file to upload)
*Workflow automatically selects the right description for the image.
2. Specify promt as director:
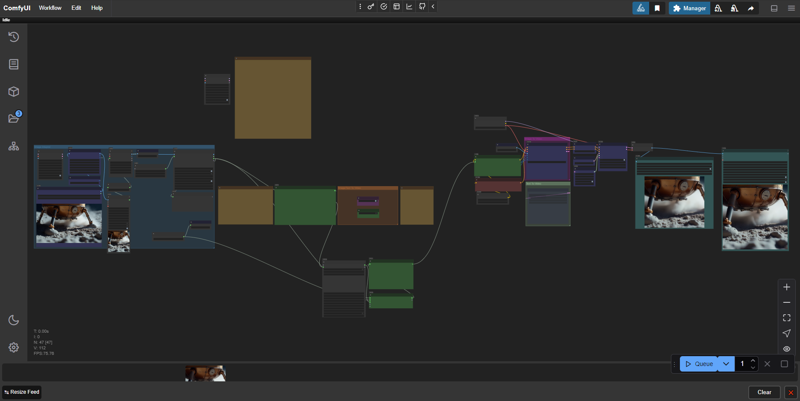
-- Description: you can switch between ImgToVideo and TextToVideo in the Image/Text To Video mode selection section. Choose whether you want to work with images, or text. If you want to convert images to video, all the settings are on the left side, in the “Image intepret” group. If you want to work with text only, all settings are on the right side, in the “Text To Video” group.
Additional settings such as fps, steps, cfg are on the rightmost part of this vorkflow, but the default works fine. --
2.(1). LLM Llama 3.2 generates cues based on your promts, you need to write everything related to movement, light play and all that moving stuff, Florence2 is responsible for the static promt.
2.(2). Manual mode (In development) Will be added in the next versions. At the moment vorkflow only supports LLM input, but you can switch to manual mode yourself:
- Write simply and clearly. I would even say straightforward.
- Describe what will happen in the frame: Someone will walk, turn around, show where the scene will go next.
- Emphasize the genre and tone of the scene (realistic, cinematic, cartoonish).
Indicate if the scene is inspired by a specific media format (movie, animation, photography).
- Will the camera stand still or move forward, behind the character, around the character, or some special kind of
first-person view.
Example:
Two police officers in dark blue uniforms and matching hats enter a dimly lit room through a doorway on the left side of the frame. The first officer, with short brown hair and a mustache, steps inside first, followed by his partner, who has a shaved head and a goatee. Both officers have serious expressions and maintain a steady pace as they move deeper into the room. The camera remains stationary, capturing them from a slightly low angle as they enter. The room has exposed brick walls and a corrugated metal ceiling, with a barred window visible in the background. The lighting is low-key, casting shadows on the officers' faces and emphasizing the grim atmosphere. The scene appears to be from a movie or television show.
?Tip: use DeepL AI browser extension in the google store to translate the text if you are not an English speaker. Highlight the text and press ctrl + shift + x, selecting the translation language beforehand.
Official Instructions:
Start with main action in a single sentence
Add specific details about movements and gestures
Describe character/object appearances precisely
Include background and environment details
Specify camera angles and movements
Describe lighting and colors
Note any changes or sudden events
More detailed instructions next to the window for creating a promt.
3. All customization takes place in the groups marked in blue. It is not advisable to touch the rest. The same exception is the node “LTXVScheduler”, in which it is also better not to change anything except the steps parameter (default 30).
3.1 You can also twist the CFG. By default - 3.0, the official recommendation is 3.0-3.5, but many people use 5, this parameter according to my observations is needed for more moving results, or more contrasty picture, but on text encoders from PixArt-XL-2-1024-MS model produces more stable results, judging by the video on YouTube, and also require more memory, so for weak video cards use less intensive values of 3.0-3.5. I still haven't fully figured out how this affects it though.
4. Click Queue and wait for the result. The files are saved in the ComfyUI\output folder, the output is video: .webp .mp4 and temporary images .png, you can delete them.
?Tip: You can use my WebP Converter to remove .mp4 from the chain and save videos to .WebP faster without losing promts and settings.
▶️ https://github.com/dvl12000/webp-converter/releases/tag/v1.0.1
?Tip: After processing, try zooming in x2 or x4 times in Topaz Video AI in “Theia” mode, add Sharpen ~50 and Apply Grain by default. This will make a really big improvement!
⚠At the moment workflow requires a bit more video memory and is inferior to the quality of manual workflow, but in the next versions the instructions for promt engineering will be improved, use the manual workflow file in the archive, it is more stable at the moment and requires less video memory.
----------------------------
Rate the build, leave a comment and happy generations! ?
描述:
First version✨? I hope you enjoy it.
训练词语:
名称: emlLTXTTVITVV10_v10.zip
大小 (KB): 46231
类型: Archive
Pickle 扫描结果: Success
Pickle 扫描信息: No Pickle imports
病毒扫描结果: Success


