![Live Portrait Workflow [XL, PONY, SD1.5]版本v1.0 (ID: 984999)](https://image.1111down.com/xG1nkqKTMzGDvpLrqFT7WA/e0f4dfdf-502a-4caa-a3e6-94d912bcfd6b/width=450/36050401.jpeg)
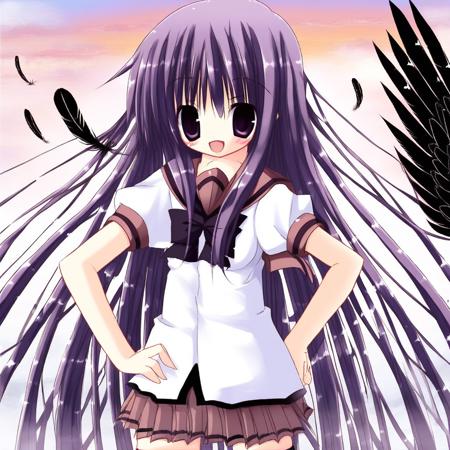
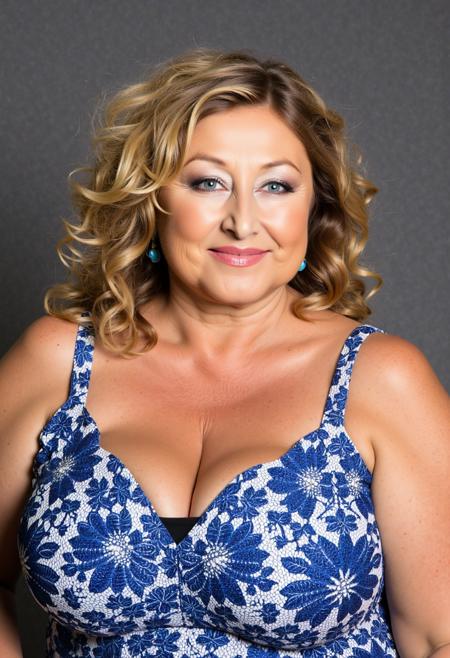
This workflow is a streamlined Video2Image2Video to create live portraits. You can cartoonify yourself or use videos to animate your favorite characters! I'll include a .json file of the workflow and an example copyright-free video for you to follow.
Here’s a breakdown of each step:
Step 1: Load the Video and Get the First Frame
To start, you'll need to grab the first frame from your video, which will be the image to which the nodes map all the facial points for the animation.

-
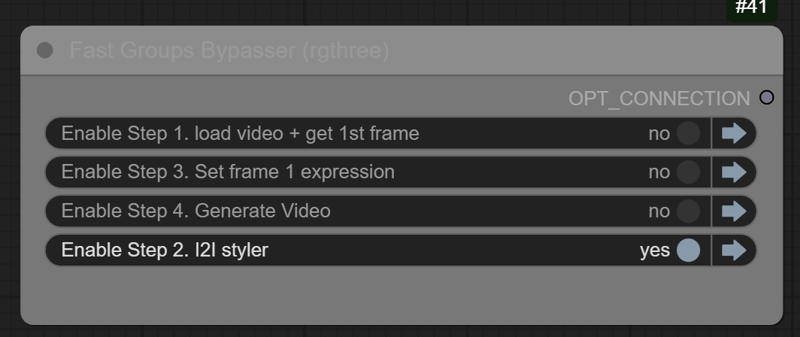
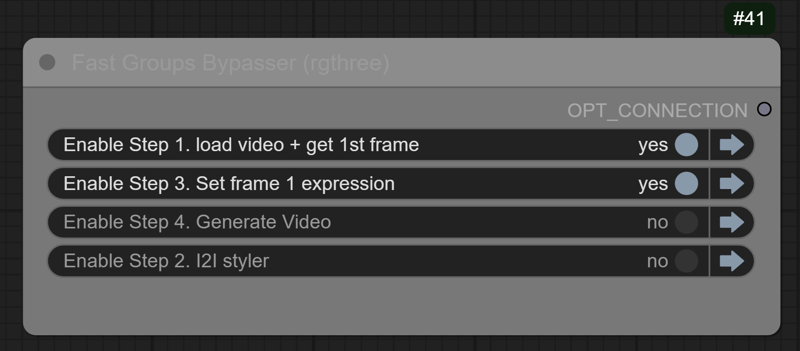
Bypass all other groups in the workflow
-
Load the video and queue up your prompt to start.
-
Copy the first frame to your clipspace once it's loaded.

-
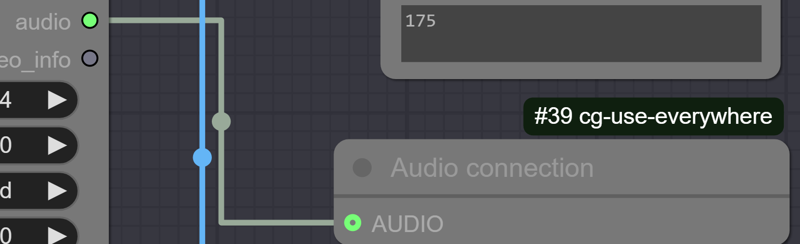
If your video requires audio, connect the audio output to the corresponding node.
-
After copying the frame, bypass this node and move to step 2.
Step 2: Generate the Character or Face Using Image-to-Image (I2I)
Now, it's time to create the character or face you want to animate.
-
Bypass all other groups except for this one.
-
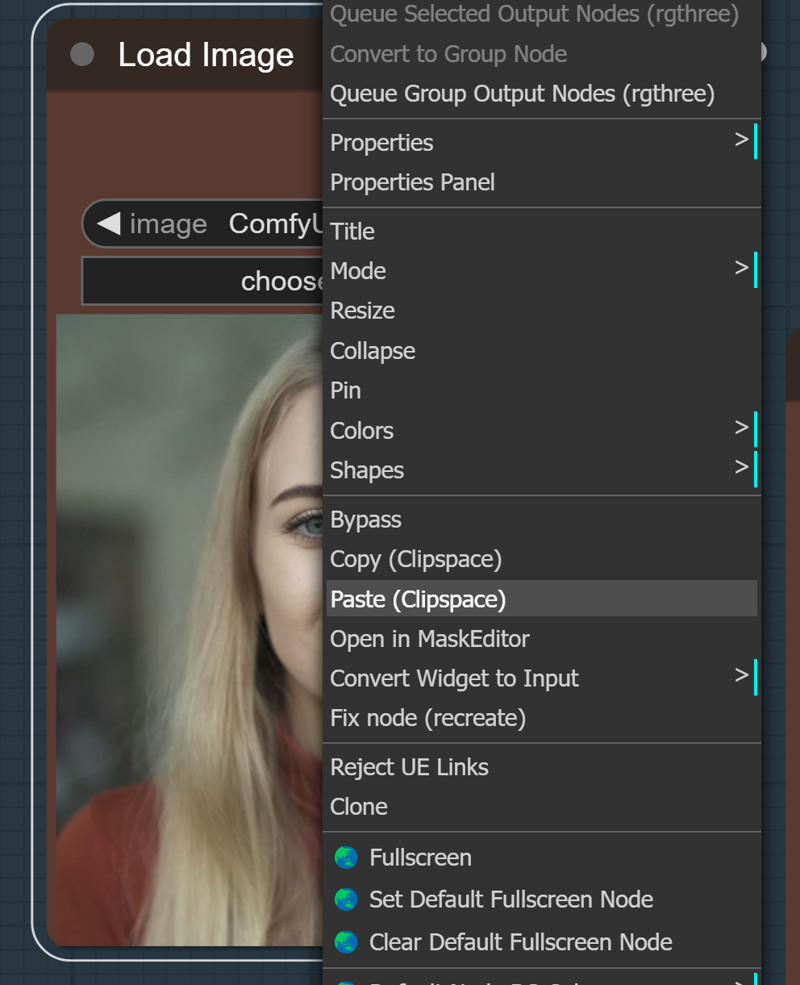
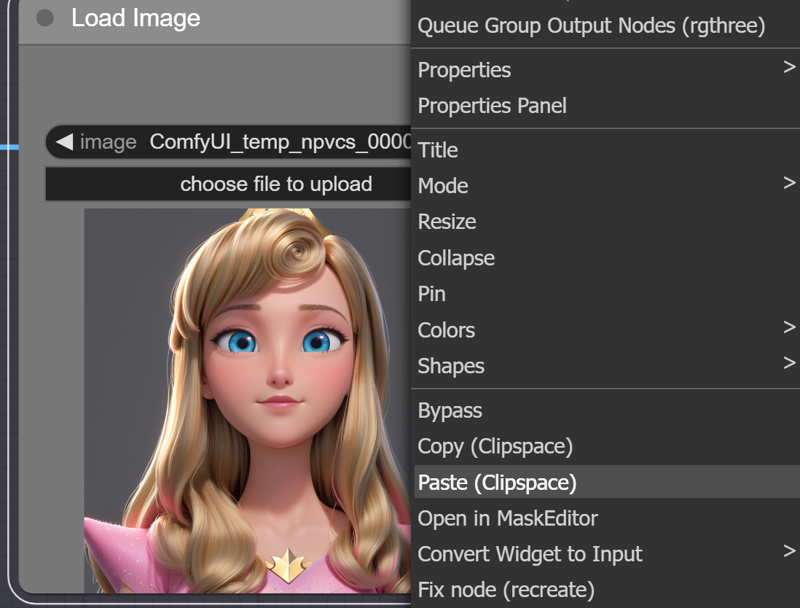
Paste the first frame from your clipboard into the load image node. (you can stretch a pipe with the image to the upscale image node if you prefer.)
-
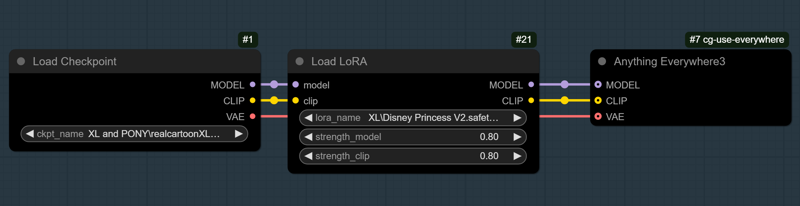
Choose a ControlNet model that ensures the face's position stays consistent throughout the video (OpenPose and LineArt work well here). Adjust the ControlNet strength and end_percent and the scheduler denoise to achieve the image you like. The basic guidance is turning the denoise down, and the ControlNet strength and end_percent up makes the input image influence the final result more.

-
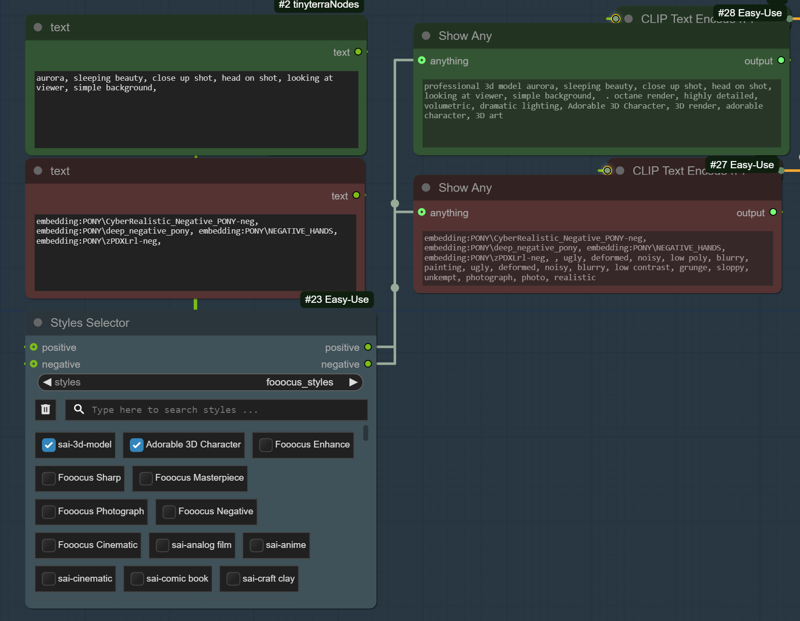
Run image-to-image multiple times to adjust and fine-tune the facial features and animation style until you’re happy with it. I like using the style selector from the Easy-use custom nodes pack to capture styles easily. (I highly recommend this checkpoint by 7whitefire7 for cartoon styles. It is amazing! RealCartoon-XL - V7 | Stable Diffusion XL Checkpoint | Civitai)
-
If needed, you can copy the output image, paste it back into the load image node, and run it again to refine details further while keeping the size and framing intact.
-
 Once you're satisfied, copy the I2I output to clip space and move on to step 3. (again, you can connect the pipe from the VAE decode node to the step 3 upscale image node if you prefer.)
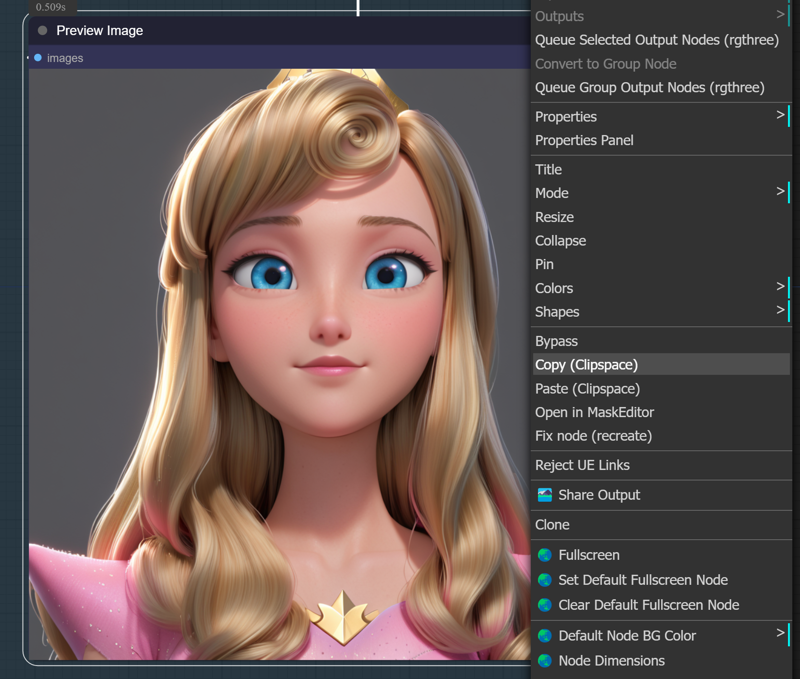
Pro Tip: A 1:1 ratio works best with live portrait nodes, so keep that in mind while generating.
Step 3: Match the First Frame for Best Face Mapping
This step ensures that your animation starts in sync with the first frame of the video.
-
Bypass groups 2 and 4 .
-
Paste the I2I output image from step 2 into the load image node.
-
Queue the prompt to match the first frame's expression and head position. This is where the tracking points will be mapped. In this example, I did not get a good map. I will turn down the sample_ratio input so that sample frame 1 has less influence.

-
Adjust expressions if needed (e.g., increase "aaa" for an open mouth or "smile" if the character is smiling). In this example, I used rotate_pitch to turn her head down a little, adjusted me and woo to change her mouth shape and turned the sample_ratio down.

-
Ensure auto-queuing is enabled or queue up the prompt manually to see the expression changes in the expression editor node.
-
Adjust the crop factor input to zoom in 2.0 is no crop, and 1.0 is a max crop. Match this setting in the advanced live portrait node in step 4.
-
Once the face mapping is set, move on to the final step.
Step 4: Generate the Final Video, Interpolate, and Save
This is where it all comes together!
-
Bypass step 2, and make sure steps 1, 3, and 4 are active.

-
Check if you're including the audio, ensuring it's connected properly.
-
Queue up your prompt, and the workflow will handle your face mapping and interpolation.
-
Once everything looks good, save your final video!

Wrapping Up
That’s it! This simple four-step workflow makes using a video to guide an animated portrait easily.
If you run into any issues or have questions, comment, and I’ll be happy to help!
Workflow Author: OpalSky
Resources:
Enjoy creating your live portraits, and I can't wait to see what you come up with!
描述:
训练词语:
名称: livePortraitWorkflowXL_v10.zip
大小 (KB): 14691
类型: Archive
Pickle 扫描结果: Success
Pickle 扫描信息: No Pickle imports
病毒扫描结果: Success
![Live Portrait Workflow [XL, PONY, SD1.5]](https://image.1111down.com/xG1nkqKTMzGDvpLrqFT7WA/a2e5bc2a-1a71-45cb-a9c3-9a1cd277f917/width=450/36050418.jpeg)
![Live Portrait Workflow [XL, PONY, SD1.5]](https://image.1111down.com/xG1nkqKTMzGDvpLrqFT7WA/13fa01c6-e376-4250-8ee4-0dc1d2d9e1ed/width=450/36050419.jpeg)
![Live Portrait Workflow [XL, PONY, SD1.5]](https://image.1111down.com/xG1nkqKTMzGDvpLrqFT7WA/2a50b1f2-2fe4-4348-b703-b60f799e4811/width=450/36050399.jpeg)
![Live Portrait Workflow [XL, PONY, SD1.5]](https://image.1111down.com/xG1nkqKTMzGDvpLrqFT7WA/c4918fb0-9ad3-4ab8-ba91-270d54672a66/width=450/36053908.jpeg)
![Live Portrait Workflow [XL, PONY, SD1.5]](https://image.1111down.com/xG1nkqKTMzGDvpLrqFT7WA/135cd5b1-16f2-43f4-bff8-c57b5489ba44/width=450/36054267.jpeg)