v5 pack -- (install info, show more, scroll down)
v5 pack --
v4 pack --
v3 pack --
v2 pack
v1 pack
KODA Collection
New Kolors Base Model
with IP adapter plus in ComfyUI
v1 pack
- base txt2img and img2img workflow
- base Kolors IP adapter-plus
v2 pack
- Advanced IP Adapter workflow with SUPIR Upscaler
- Base workflows for running Hyper Kolors /LCM Kolors
v3 pack
- ip adapter embeds
- all in one workflow
- SUPIR upscaling
v4 pack
-
12K, 3 stage upscaling
-
SDXL checkpoint merge, UNET Block Weighted
-
Sampler Garden (Tuned Grid)
v5 pack
-
all-in-one type workflow
-
controlnet canny + depth (toggle)
-
IP Adapter advanced (toggle)
-
Sampler Garden (toggle)
-
12K upscaling (2 stage toggle)
v6 pack
-
all-in-one type workflow
-
controlnet canny + depth (toggle)
-
IP Adapter 2 stage (toggle)
-
Sampler Garden (toggle)
-
Face model creator & swapping toggle
-
12K upscaling with color match/remix (2 stage toggle)
-
auto prompt enhancer variant workflow
How to use the V6 Workflow?
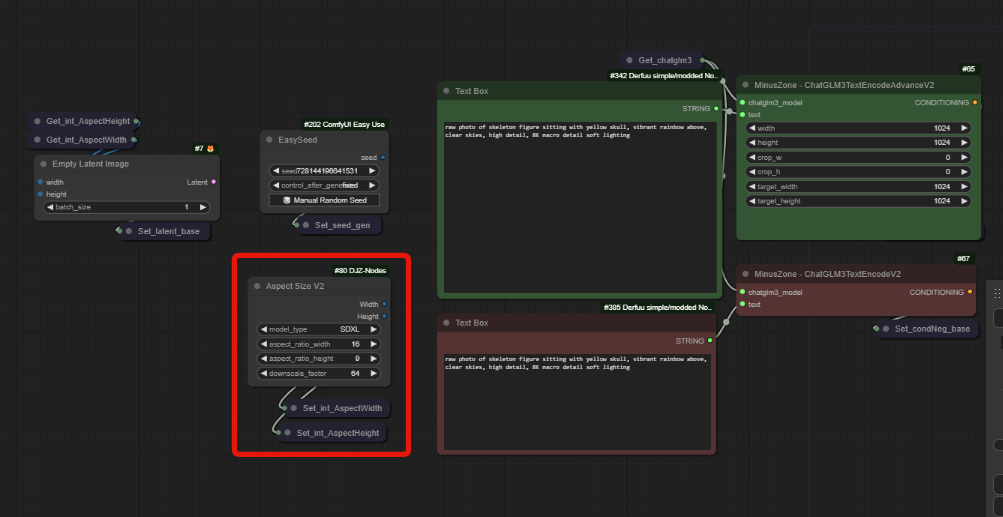
The main control panel has ben refactored for easier operation.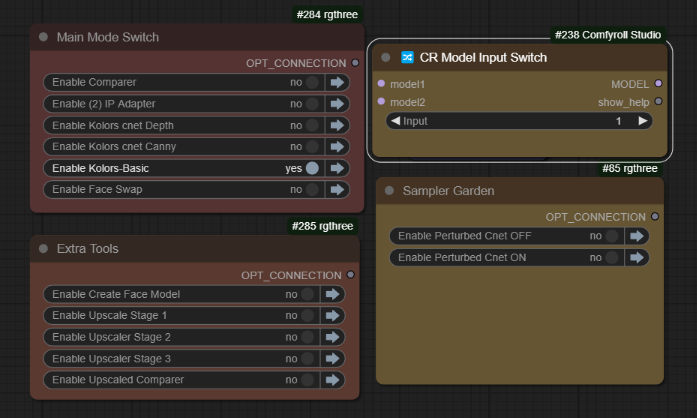 Here we can use the txt2img basic Kolors and get simple output images from prompts
When we have placed images into the IP Adapter, we can enable that like so: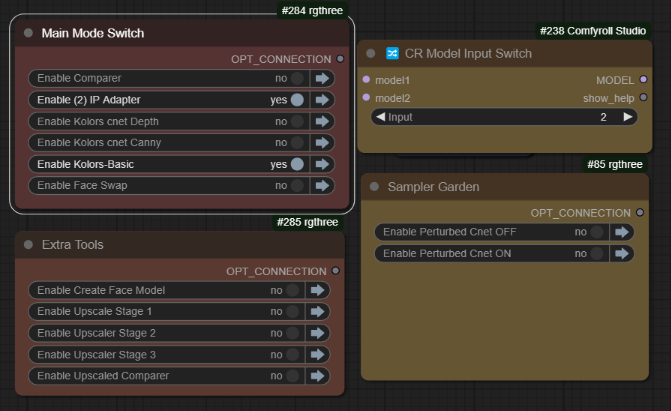 As shown above, model switch (2) is used to activate the IPAdapter. You can use the controlnets with or without the IPAdapter, by using that switch.
 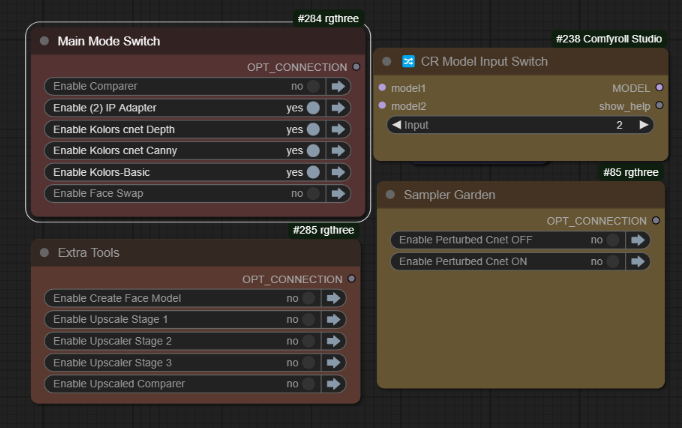 When you have finished making some good images, you can activate the Upscaling section:
all dimensions are being driven by AspectSizeV2, fully explained in the video.
With the new Upscaler, you have two options, Color match and Color Remix:
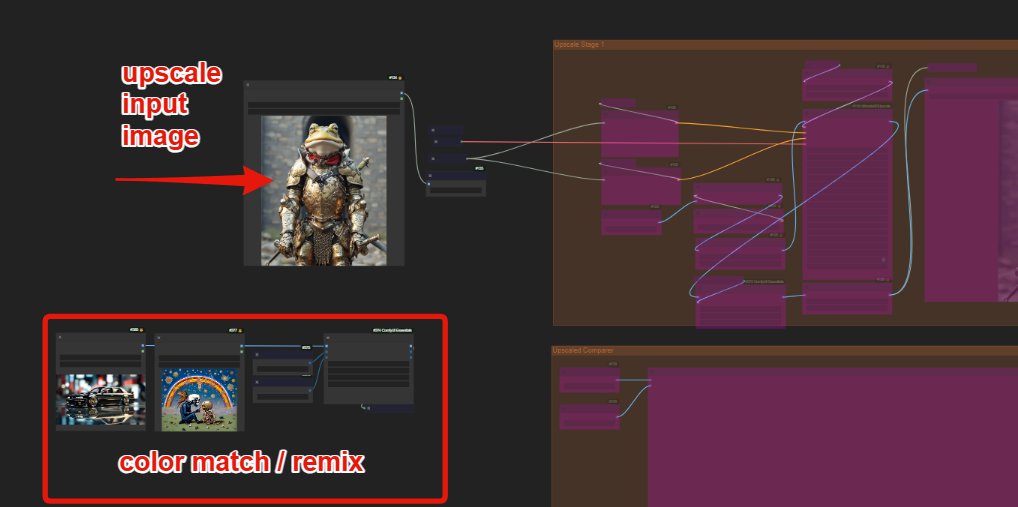
You can choose to use the same image for the color match or experiment with other images to alter the color range used.
The second new workflow used "Auto-Prompt" Enhancers for both positive and negative. Enter your simple prompt into the left most box, and use the options to enhance your prompt with magic prompt, one button prompt and auto negative.
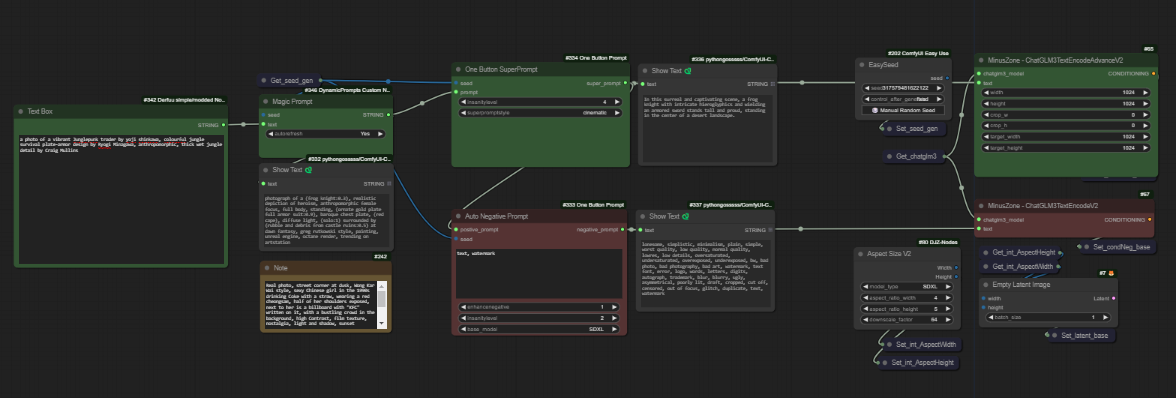 it is identical to the new all-in-one workflow, just with this added as an example of what you can do quickly with this. It will introduce many obscure tokens and has both style drop down list features and insanity levels for positive and negative. Full previews are included so you can see what was added.
How to use the V5 workflow?
txt2img with Cnet+Ipa
(Koda-Kolors-Zero-Legacy)
-
Base Kolors mode
model switch (1)
Kolors Basic enabled only
Functions as only txt2img
-
IPadapter mode
model switch (2)
Kolors basic & (2) IPadapter enabled
-
Controlnet Mode
can be used with both model postions, as you choose.
enable the Depth & Canny groups together, for default behaviour
-
All perturbed modes (sampler garden)
these can be use with or without controlnet or IPA modes
you can copy these and customise them to build a dynamic Grid
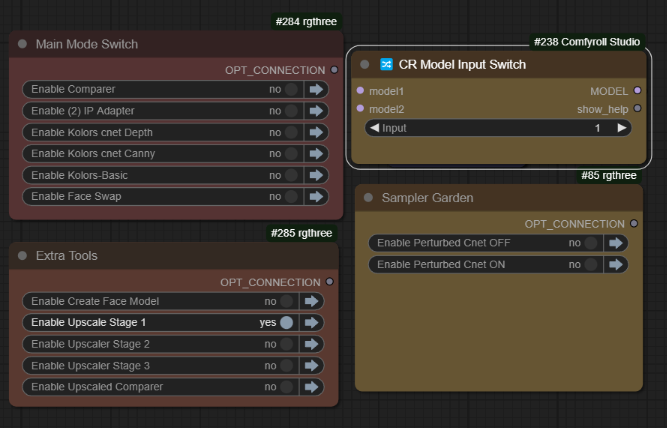
-
12K Upscaling
stage 1, 2, 3 each is performing 2X upscale, you can use your best upscaling model too
comparer located at the bottom for easy access, but beware 91mb images can cause UI lag ! recommend to minimise/collapse/remove all previews in stage 2 and 3 ;)
How to use the V4 workflow?
below pictured: Stage 4 active, switch position 4, [4] combine Embeds.
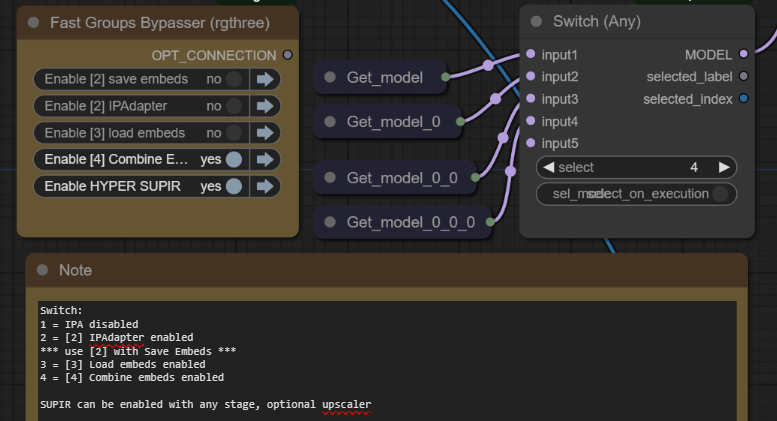 the new all-in-one workflow is multifunctional, you use it in stages 1,2,3,4 however it's much easier to use. Simply match the model switch to the active group. All is explained in the v3 video, and in notes in the workflow.
Step 1. txt2img only
model switch 1
used when all groups are bypassed
This is Kolors txt2img
Generate images and place your best ones into the IP Adapter image load nodes
The rightmost image loader will also be used as the negative embedding
Step 2. a) IP Adapter
model switch 2
requires group [2] IP Adapter, to be active
Test the output of the chosen IPadapter image batch, remember this is separate from the prompt entirely. If you are happy with the results;
Step 2. b) Save Embeds
model switch 2
requires group [2] IP Adapter to be active
saves the positive and negative as IPA embed files
these are saved to \models\output\
run once and then copy the files to \models\input\
then click refresh in comfyUI
Step 3. Load Embeds
model switch 3
requires group [3] Load Embeds, to be active
once you have created your embed, we should test it.
load the positive and negative, then test the generations.
repeat the process with characters, styles and scenes so you have some elements to be mixed, then we can head to the final stage.
Step 4. Combine Embeds
model switch 4
requires group [4] Combine Embeds, to be active
Select the embeds and add or remove nodes as needed
interpolation and operators are available, with all the usual IP Adapter nodes.
This can work like Aesthetic Embeddings worked with SD1.5
For most purposes, we want to anchor in a style or concept and then use text prompts to generate, LORA is the best for this, however this can get very close within the constraints of the model memory.
the SUPIR group can be toggled with any stage for easy upscaling
~
You will need:
-
install any and all missing custom nodes & use the latest version of ComfyUI
-
watch the v1 video for more setup info
https://huggingface.co/Kijai/ChatGLM3-safetensors/tree/main
download one of the models, i will use the fp8 version, you might use another.
place inside ComfyUI\models\LLM\checkpoints\
https://huggingface.co/Kwai-Kolors/Kolors/resolve/main/unet/diffusion_pytorch_model.fp16.safetensors
place inside ComfyUI/models/unet/diffusers/kolors
https://huggingface.co/Kwai-Kolors/Kolors
I also added all of these files from diffusers here.
we already downloaded the "diffusion_pytorch_model.fp16.safetensors" and put it into the /models/unet/kolors/some of the nodes look in a different location, it's up to you which method you want to use as both will work, this is discussed in the video.
We do not need any .bin of the contents of text_encoder because we took the ChatGLM3.fp8.safetensors instead.
structure of ComfyUI\models\diffusers\Kolors\
ComfyUI\models\diffusers\Kolors> tree /F

│   model_index.json

│

├───scheduler

│       scheduler_config.json

│

├───text_encoder

│       config.json

│       tokenizer.model

│       tokenizer_config.json

│       vocab.txt

│

└───unet

        config.json

        diffusion_pytorch_model.fp16.safetensors
Kolors IP Adapter
https://huggingface.co/Kwai-Kolors/Kolors-IP-Adapter-Plus
download ip_adapter_plus_general.bin
place inside \models\ipadapter\kolors\
Kolors Clip Vision
https://huggingface.co/Kwai-Kolors/Kolors-IP-Adapter-Plus/tree/main/image_encoder
download pytorch_model.bin
place inside \models\clip_vision\kolors\
https://civitai.com/models/441432/mistoline
place inside \models\controlnet\kolors\
I'm suggesting a subfolder, or if you prefer rename them as needed.
VAE
For all the VAE - just use your favorite SDXL VAE
CONTROLNET
download and rename to kolors_controlnet_depth.safetensors
https://huggingface.co/Kwai-Kolors/Kolors-ControlNet-Canny/resolve/main/diffusion_pytorch_model.safetensors?download=true
download and rename to kolors_controlnet_canny.safetensors
and place both inside \models\controlnet\kolors\
~
Would not be possible without the efforts of
@cubiq [IP Adapter nodes]
@kijai [Kolors Wrapper]
@MinusZoneAI [Kolors Ipadapter nodes]
Cubiq
https://github.com/cubiq/ComfyUI_InstantID
Kijai
Minus Zone AI
https://github.com/MinusZoneAI
描述:
adds advanced IPadaptor workflows & SUPIR upscaling.
训练词语:
名称: kodaKOLORSPackControlnets_v2.zip
大小 (KB): 26
类型: Archive
Pickle 扫描结果: Success
Pickle 扫描信息: No Pickle imports
病毒扫描结果: Success